paint series
Painting the Escort (Part 7) – Done!
More or less. Basically, this project was undertaken so that I would learn how to paint a car. I learnt, among other things, that there is a lot of time needed for a project like this, lots of preparation, and there are plenty of opportunities for things to go wrong. Come and see my car in person, and you will probably notice a few issues: drips here, peeling there, un-even coat, see the primer through the paint, etc..
But, the truth is, that doesn’t really bother me! I’m proud of all the work I’ve put in. It has taken me a week and a half, and about $280 in materials, and for that price, I’m happy. And the car looks happy, too.
Painting the Escort (Part 6) – Painting! (the Escort) [Part 1]
What a ridiculous title! What it means is simple: this is the first post dealing with the actual painting. Why don’t I simply wait till I’m done painting and make a single post? Because, it is the process, not the product, that matters. Deep.
Now, this morning I did my first coat. Then, tonight, I did my second coat (see the image EXIF data for the times: I work late). The plan is that I will pick up more paint tomorrow morning, then do a third coat. I will see how it turns out, and chances are I will let it dry till the next morning, when I will do a light wet sanding to remove the dust and bugs that may get stuck it in, smooth off the paint, then I will do the final coat (or two…)
More photos after the break!!! (And, of course, the photo of me that I promised). › Continue reading
Painting my Escort (Part 5) – Primer
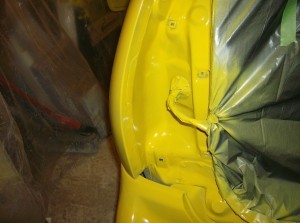
Well, today I did the two coats of primer. This was great, because I learnt two valuable things: technique for painting, and how many cans it takes per coat. I was surprised to discover it took about 3 cans of primer (430 g per can) to do one coat. I only had 2 cans, and I wanted to do 2 coats, so I ended up grabbing more primer, and I also bought the last cans of Yellow Tremclad from the Aylmer Canadian Tire: sorry!
Total cost so far: a little over $200. Not too bad I suppose. Now I’ve got 10 cans of yellow, which should be enough for 3 coats. However, I still wish to do more than 3 coats, just to make sure it is bold and durable, so I may end up grabbing more paint. However, the topic of this post is the primer, and here it is!
This morning, I applied one coat, then I let it dry for about 7 hours (I did the first a little before noon, and I did the second a little after 6). This is the fast dry stuff, and it felt dry after only about 30 minutes, but naturally I gave it more time.
Tomorrow, I plan on applying one coat in the morning, and then seeing where I end up. I hear too many different instructions for painting, so I will see which way feels best after I get started. My dad says to blend the coats, and do one after another. Previous instruction has told me that for spray paint I should do a coat, let it dry, then do another. After the first coat tomorrow, depending on how it goes on and dries, I will determine what to do.
Click for more to see some before and after shots!
Painting my Escort (Part 4) – Masking
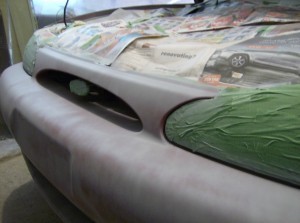
Since yesterday afternoon/evening, and all of today, I’ve been masking the car, all the parts I don’t want paint to get on. Finally, I have finished that! I’m ready to go and spray it all!
However, there is a slight change in plans. Originally, I was going to paint just the door interior edges, and other crevice work, but then I decided I am best off covering everything up, then doing the whole thing in one shot. So, tomorrow morning, I will begin priming, after I wipe it all off with gas.
More photos after the break.
Painting my Escort (Part 3) – Sanding
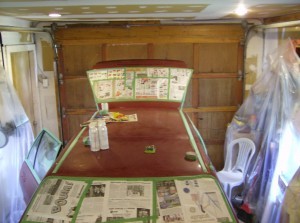
Lots of it. Depending on how long and hard you work, it can take from hours to days. I worked at it non stop on Wednesday, from 8:30AM to 5PM, and then again this morning for a couple hours, and now it’s done. It is very rhythmic and mind numbing work: time flies, and your mind separates from the task at hand… It was fun! Here are some of the results:

The nicely sanded hood. Notice I did a proper job, and removed the washer nozzles.
Painting my Escort (Part 2) – Body Work
So yesterday, Monday, the 24th of May, me and my dad began the body work on the Escort. The process went a little something like this:
- Grind the paint off around areas that bubble and are cracked.
- Sandblast the areas that have rust on them, then around the areas to be patched.
- Put fiberglass body filler around all the areas and in the holes.
- Grind down a bit.
- Use Bondo over top of the fiberglass to give it a smooth finish.
Yesterday, my dad let me do a lot of the work to get used to the tools and process, so naturally, being my first time operating any of these power tools, I didn’t do a godly job. However, I certainly didn’t do too bad!

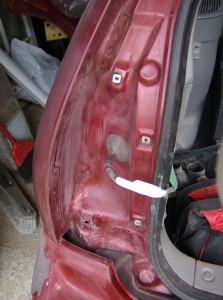
This is as finished as we got the back right fender yesterday.
Painting my Escort (Part 1)
Summer is here! And, I have plenty of little projects lined up. Right now? Painting my car. No, this definitely doesn’t count as a little project. The rust has come back after I painted it last year, and I realized that the Duplicolor/Canadian Tire paint/primer doesn’t last at all. However, I realized that the section of my car I painted using Tremclad is in the same condition as it was last year!

This is the repair with the Duplicolor. Didn’t last so long.
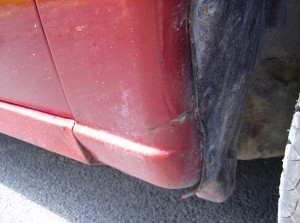
This is the Tremclad job: not too bad!
I have been wanting to paint my car Yellow for the longest time. Now, having realized the rust is back, and will continue costing me money, I decided I’m going to paint the whole car!

