networking
Problems Connecting to WireGuard VPN using Ubuntu 24 Client
I… can’t believe I have to write this post. In fact, I also can’t believe it took me to so long to get working. Generally, I wouldn’t consider myself stupid but today I have to wonder.
WireGuard is one of many protocols for VPN tunnels, and I’ve been using it for the past few years. That’s not to say it is the first VPN server I’ve worked with, oh no – there is a list:
- PPTP/MS CHAP on DD-WRT (ew)
- L2TP/IPsec with SoftEther/pfSense
- SSLVPN with WatchGuard
- OpenVPN with SoftEther/pfSense/OPNsense
- WireGuard with OPNsense
While not a VPN newb, the experience using WireGuard seems variable on different platforms. The Windows WireGuard client is excellent. The Android client is even better, with the QR code automatic configuration.
So why am I having problems now? Well, recently I decided that fighting M$ is no longer worth it. After many failed attempts over the years, I’ve finally converted all my servers and daily-driver PCs to run some variant of Linux (👏 slow clap).
With Ubuntu on my PC, I got to work configuring the system the way I need – which includes setting up my WireGuard VPN connection. This is where the rabbit hole began, and is why this write-up exists.
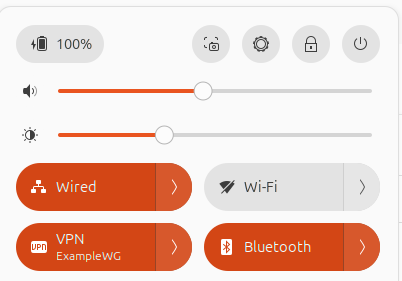
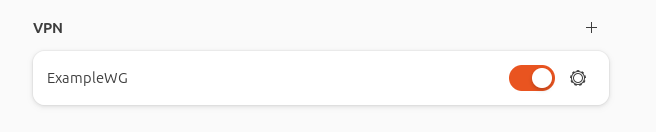
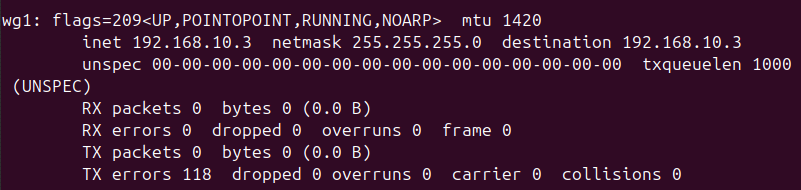
Once it was configured and added, toggling on the VPN connection seemed to work, but no traffic flowed. Also, the server did not show the connection. Why are things always harder on Linux.
The Problem
Let’s not beat around the bush, the VPN configuration section under GNOME Settings has some flaws and bugs.
- If you switch windows from the Peer settings modal, for example to copy the Public Key from your browser, the modal goes away and doesn’t save what you just entered.
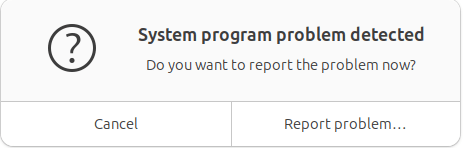
- If you change the MTU or fwmark back to 0, GNOME Settings just crashes.
Working around the annoying copy-paste process for the Public Key, adding the WireGuard configuration wasn’t the problem. It was actually connecting afterwards.
LMGTFY
You know I searched. There are tons of guides that make it seem easy. And none of them hit the nail on the head for this issue (though that last one was where I had a eureka moment).
The logical search term “can’t connect ubuntu wireguard client” did not find the answer – so I’m writing this article hoping you searched for the same thing and it solves your problem.
TL;DR
Here is the solution that worked in my case.
› Continue readingFreeBSD / pfSense slow network with Hyper-V

For some reason, it took me way too long to find information about this issue – so I’m writing another article that will hopefully help some people.
IT Ticket # 1337
Problem Description: Network performance through pfSense is extremely slow with Hyper-V
Software Versions: pfSense 2.6.0 and Windows Server 2022 (August 2022 patches)
Steps Taken Already: Confirmed hardware TCP offload is disabled; confirmed hardware checksum disabled; confirmed MTUs were correct.
Solution: Read on for the solution (hint: it’s a known driver bug, and for now only a workaround exists)
› Continue readingSTEVE – New chassis, 3D printing, fresh electronics!
 Plenty has happened since our last post, and most of it can be summarized with the following picture.
Yup, lots of wires. New body, too. With my 3D printer back in service, cases were printed for the electronics, along with new wheels all around. These new wheels add around an inch of ground clearance, and better off-road traction.
As well, the first shipment of new parts has arrived: a USB WiFi adapter, an ultrasonic range sensor, H-Bridge motor controller, 9-DOF IMU and a temperature probe.
There are a lot of really cool developments in this post; let’s dive in.
Creating a Private + Guest WiFi Access Point (DD-WRT)

Recently I was asked to configure a WiFi access point for a small business, who needed to have both a private internal network, and a public guest network.
There are many privacy concerns when having guests share your network. Specifically, it is desirable to:
- Disallow access to any computers on the private network
- Prevent network abuse (such as P2P file sharing)
- Secure the access point itself from tampering or unauthorized access
Of course, all this needs to be done without impacting the desired service: Internet access.
Although I found many guides online for setting up a guest network when the access point was also the primary router, I didn’t find any that worked for the intended network. So, after some trial, error, and research, I managed to get it to work.
Bell Aliant FibreOP with a DD-WRT Router
This has been a long time coming. To summarize, Bell Aliant’s FibreOP Internet service includes a wireless router that has proprietary, limited firmware. It tends to suffer from latency and WiFi issues. So, I sought to replace it with my own wireless router! I ended up first building an overpowered but very functional pfSense Linux Firewall/Router.

Despite my monstrous UPS, I was not happy with the 1 hour run-time. The whole reason for the pfSense router was that FibreOP “hides” its Internet on a VLAN, which means a standard, consumer router will not be able to access the Internet. And from some forum posts I had read, it seemed DD-WRT was also incapable of it.
Finally, today, I pushed through and realized it takes only 4 simple steps to connect a DD-WRT router directly to the FibreOP modem.

Making Bell FibreOP Work With a pfSense Router
Atlantic Canada is very fortunate to have access to Bell Aliant FibreOP Internet. It is a legitimate Fibre-to-the-Home (FTTH) service, in the same price range as cable and DSL offerings. Speeds start at 50/30 (download/upload in Mbps) for $70/month without any promotions.

As great as the Internet itself is, the wireless router they include is the bottleneck. It is an Actiontec R1000H. Our biggest headaches with it were low WiFi throughput and frequent WiFi drop, but the interface was a little lacking in advanced features.

The logical solution is to use another router. Unfortunately, Bell has configured the service in a way that simply swapping in a new router will not work at all!
Through some research and my own trial and error, I was able to install pfSense to a spare computer, and take control of my Internet.
Disclaimer: Do not follow these steps if you have Bell’s IPTV service, as it will no longer work. There are other sites that describe how to keep those services working, but mine does not. As well, though there should be no impact, I advise against doing this if you have FiberOP Home Phone and rely on it for emergency communications.
This is not an easy task. It requires a very good understanding of computer networking, basic understanding of Linux networking terminology, and availability of network equipment (switches, wireless access points, cables, NICs). Chances are you found this page because you meet some of that description. Just know that if it isn’t working out, you can plug in the Actiontec and pretend it never happened.