STEVE – New chassis, 3D printing, fresh electronics!
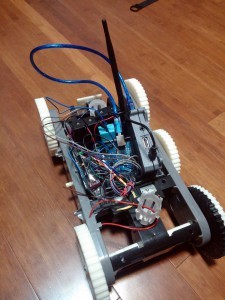
 Plenty has happened since our last post, and most of it can be summarized with the following picture.
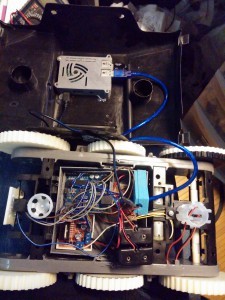
Yup, lots of wires. New body, too. With my 3D printer back in service, cases were printed for the electronics, along with new wheels all around. These new wheels add around an inch of ground clearance, and better off-road traction.
As well, the first shipment of new parts has arrived: a USB WiFi adapter, an ultrasonic range sensor, H-Bridge motor controller, 9-DOF IMU and a temperature probe.
There are a lot of really cool developments in this post; let’s dive in.
Chassis
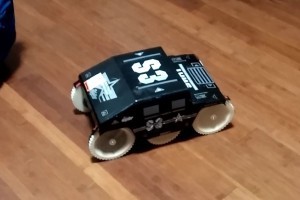
![31O0SVih3CL[1]](https://blog.danjoannis.com/wp-content/uploads/2015/11/31O0SVih3CL1-e1448213297752.jpg) By far the most obvious change is STEVE’s body. Before, a Porsche 944 served as the initial test platform. A visit to the thrift store scored a remote control Humvee, with 6-wheel drive.
By far the most obvious change is STEVE’s body. Before, a Porsche 944 served as the initial test platform. A visit to the thrift store scored a remote control Humvee, with 6-wheel drive.
It was originally designed as a wall climber, so the first order of business was removing all the fans, duct-work and Styrofoam. The result was a skeleton ready to be re-purposed.
 The biggest difference between the Humvee and the Porsche is the drive train. The Porsche had front steering wheels, while the Humvee is driven like a tank. This forced major changes to the driving control code, since steering now involved slowing down one of the drive motors, rather than turning the front wheels.
This is good news, though. It is much easier to design a robot that can turn in place, than one which must learn how to complete a 3-point turn. There is a small limitation to this platform, and it is obvious by looking at the product image – the tires are just not big enough. While perfectly comfortable driving along flat walls, these tiny wheels are useless on the ground.
Is it 3D printer time?
3D Printing
The stock wheels just won’t do, so with a bit of 3D modelling and a pair of calipers, new knobby tires were designed. These should be fairly good off-road, and they do reasonably well on floors.
Four large ones and two smaller ones printed, and STEVE is almost 1.5″ off the floor. Lots of clearance, though it required cutting some plastic from the toy’s shell to make it all fit.
A few more hours of modelling and printing later, and a few more parts were made.
- Floor-pan for holding electronics
- Raspberry Pi enclosure
- Voltage regulator enclosure
- Arduino bumper
New Parts
Now that the WiFi adapter is here, the first thing to do was to cut the tether. STEVE is now wireless, and no longer needs Ethernet. Over WiFi I can transfer files, connect over SSH, and even flash the Arduino wireless using the Pi!
The temperature probe doesn’t have any immediate application, so it hasn’t been installed yet. The ultrasonic range finder, however, is absolutely very cool and was tested post-haste.
To mount it to STEVE, I printed off a bracket from Thingiverse designed for the HC-SR04 Ultrasonic Range Finder. Some hot glue holds it in place.
 All of the code running on the Arduino is written in AVR C. Unfortunately, a lot of libraries for the range finder are written in Arduino C++. It took a fair bit of digging and piecing together code fragments in order to make my own AVR library for the range finder. However, it works well and returns the distance in centimeters.
The new motor controller was a drop in replacement, which allowed me to clean up the wiring a bit. It tends to get warm while doing nothing, unlike my original non-heatsinked controller, but I’ll see how the $4 part fares long-term.
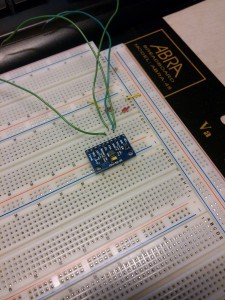
You might noticed I skipped over the coolest part – the 9 DOF Inertial Measurement Unit. This is because I haven’t been able to bring it up yet. The specs say it is 3-5V tolerant, though this is a clone of a unit that only supports 3.3V. My I2C libraries are likely not very good either, so I will need to do a bit more development before everyone is talking happily.
Software
All of these new toys are nothing without some software to tie it all together. A lot of new features and libraries were added to steve_io, the AVR component of STEVE. Now that the platform is no longer tethered, development of the Linux software which will function as STEVE’s brain can begin.
Initially I was looking at Python because of how popular projects that use it are. However, I’m not feeling as comfortable as I’d like with it, and I’m thinking of writing steve_linux in C++. By the next update there should be plenty of development on this.
With new development coming, some changes needed to be made for the development environment. STEVE will need access to the same files I’m using to develop on my PC. Dropbox is not ideally suited to this, and is not trivial to set up on the Pi. I decided to dust off my GitHub account, which also allows me to share all my code and files in the future.
So far, GitHub is a manageable way to control code revisions and keep files synchronized between the Pi and my PC. I’ve gotten so used to Subversion, though, and am finding GitHub adds a few more steps to the workflow. We’ll see with time what I decide to go with.
Summary
- STEVE has a new body better suited for off-road traveling.
- New parts have arrived, and all but the IMU are installed and working.
- Development of the Linux software can now begin, and hopefully a web remote control interface will be built in the next few weeks.
- STEVE looks really cool.
I’m really excited about all of this, more to come!


