Refurbishing a Brother DCP-120C Inkjet Printer
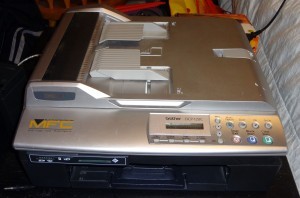
About a month ago my neighbour gave me an old Brother DCP-120C printer/scanner. The auto-document feeder was what caught my eye at first, but after I looked more closely, the type of ink cartridges it used made me very happy with this gift: they are simply little tanks of ink, with no head, meaning they are very easy to refill and should last a long time. What’s more, it only cost $7 for a full set at 123inkcartridges.ca.
However, after ordering the new cartridges and trying to print, I encountered some problems: nothing came out, except for trace amounts of colour – no black, and it certainly was not printing properly.
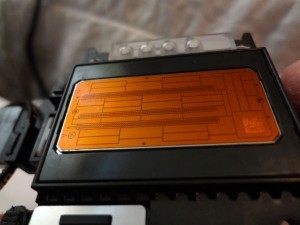
This is the inherent design flaw of these printers: they have a fixed print head, that is part of the printer. Unlike HPs and Canons (to name a few), the print head isn’t part of the cartridge. This means that if the printer is left sitting for long, and the ink clogs the head, the whole thing needs to be disassembled and either cleaned, or the head replaced.
Print head on an HP cartridge – replaced whenever you
buy a new cartridge.
Being the do-it-yourselfer I am, I decided I would tackle the task of refurbishing this printer.
Disassembly
It starts with taking it apart, and at first, it wasn’t very obvious. However, I found a video on YouTube that made it fairly easy. I do not have pictures of this stage, as the video does a very good job of explaining it.
Problems
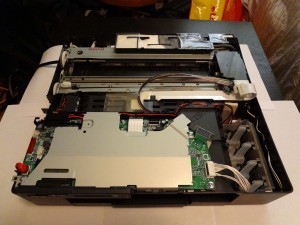
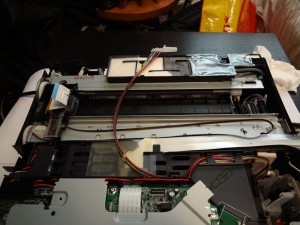
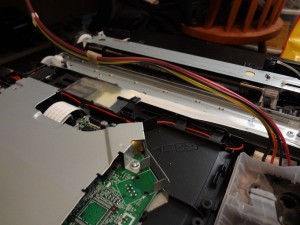
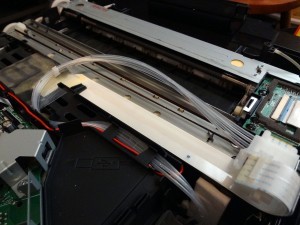
When I removed the cover, I found a few areas of concern. The main one was that the tubes running from the cartridges to the print head were full of air bubbles and dried ink, meaning it was hard to get the ink to the head in the first place. In addition, the head was very likely clogged, and would need to be cleaned.
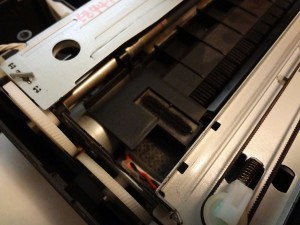
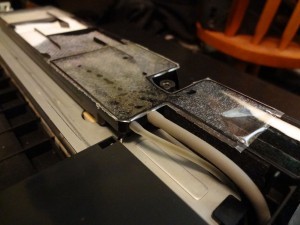
As well, there are various sponges that absorb excess ink that were all saturated. Some are located under the print head to allow cleaning, but there is also a large reservoir in the rear of the printer, which I believe is where excess ink goes during cleaning, when the pump is primed.
Cleaning
Print Head
This was the priority, as it was obviously clogged after so much time being unused. I found an excellent forum post that detailed cleaning out the print head. I will summarize the process here:
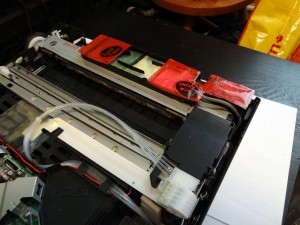
- Remove the plastic cover on top of the print head. This can be done using a flat tip screw driver and popping the tabs on each corner.
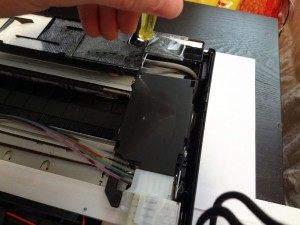
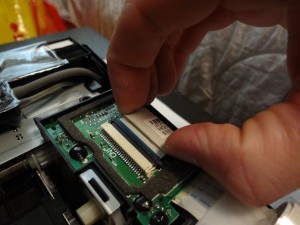
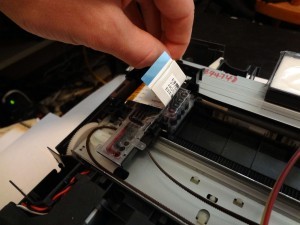
- Once the cover is removed, disconnect the ribbon cable, and gently remove the circuit board. The ribbon cable that snakes along to the main control circuitry is soldered directly to this circuit board – be careful!You will need to gently unclip the ribbon cable from the plastic clip.
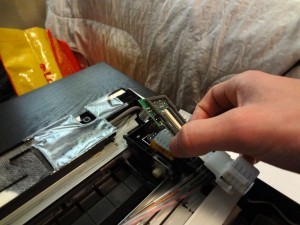
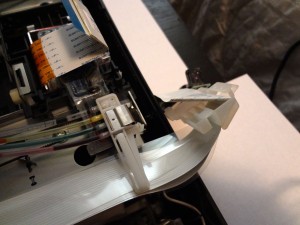
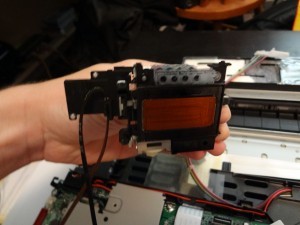
- You now need to move the print head. It is likely locked on the right side of the printer. To unlock it, use a screw driver to rotate the white gear behind the head. Rotate it enough that the head begins to slide left, and it should be free.
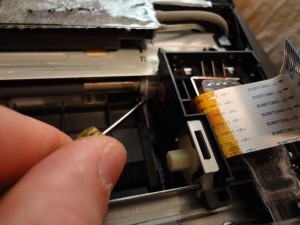
- Bring the head out a little, and remove the metal clip that is securing the ink tubes to the head. You can then disconnect the tubes by lifting the plastic up.
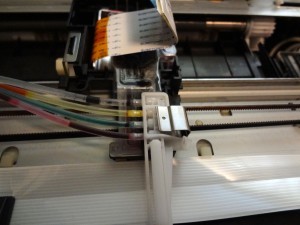
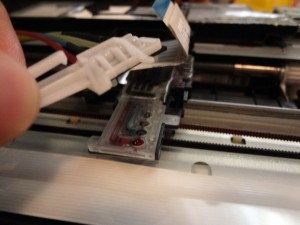
- As shown in the video, gently take off the belt that slides the head from side to side of the printer, and bring the head all the way to the left. It is just a matter of applying light pressure to the bottom and top of the head to remove it from the track.
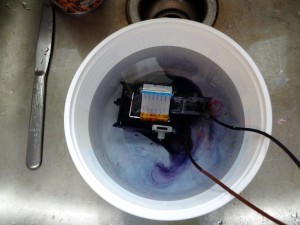
Now the print head is free, and ready to be cleaned. As per the above forum post, the way I cleaned it was by soaking it in very warm water. However, this head was very full of ink. After changing the soak water over 5 times, and still seeing ink in the tubes, I had to think of a different plan.
I noticed we had a small syringe (no needle) nearby. What I ended up doing was using the syringe, whose tip was the size of the ink inlets, to push water in an out of the head, essentially rinsing it and dislodging any dried ink. I did this for all 4 inlets, and also repeated this on the 4 prime outlets along the bottom. This results were clear:
Ink Tubes and Cartridge Holder
So now that the head was clean, it was time to clean the ink delivery channels. The tubes had old ink inside of them, and plenty of air pockets which would make it difficult to run ink through. I figured, while I had the whole thing apart, why not clean everything I can? It was free after all.
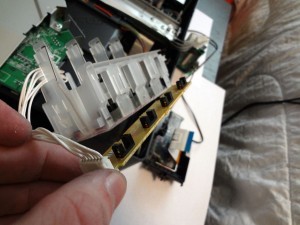
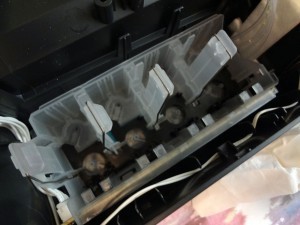
The ink tubes are connected at the other end to the cartridge holder, which itself was also quite dirty, with ink pooling at the bottom. To remove the holder, you will need to first remove the circuit board attached to it. This circuit board has 4 opto-switches, which allow it to detect when ink is running low in the cartridges.
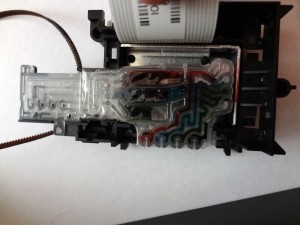
Once the holder and tubes were removed from the printer, I rinsed them out thoroughly with very warm water, and made sure to blow/suck the water through the tubes, to clean out all the dried up ink. It was very clean when I was through:
Reservoir and Sponges
These were easy to clean, but very messy. There was just so much ink in these sponges, and it would continue diluting without end. My hands were stained black due to this process, do not follow my example, wear gloves.
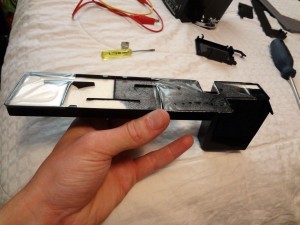
I simply removed the sponges from their holders, rinsed them out with warm water as much as possible, let them dry, and reinstalled them. In order to remove the sponges from the large reservoir, however, I needed to cut the plastic that covered them. When I reinstalled them, I used tape to re-cover them.
This process is only really necessary if your sponges are completely saturated. However, at that point, I would consider replacing the sponge entirely with paper towel; the sponge might not be very absorbent anymore.
Get the Ink Flowing
After putting everything back together, I needed to prime the tubes, to get the ink flowing to the now cleaned head. This took a lot of persuasion. The first pages I printed were basically just water.
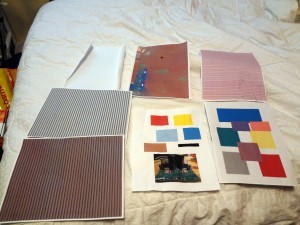
In order to really get the ink flowing, I created 4 images, one for each cartridge colour, and printed them full-page repeatedly. Cyan and magenta were the first to begin printing with full colour, but yellow and black were being stubborn. In order to get them flowing, I ran the cleaning cycle a couple times on the black and yellow cartridges, while printing whole pages of colour in between.
Finally, I achieved success, and printed a decent quality colour photo (center, surrounding by some full-page test sheets):
Concluding Thoughts
This was a great morning project, and the results were very pleasing. However, I must agree with the sentiment of other Brother owners who are upset when their print heads clog. Most people won’t bother tearing it apart to fully clean it, and the printer is essentially disposable once it stops working. This makes the built-it print head a bad design.
For people who go through ink very often, though, it is very convenient, because the cartridges are very basic, serving only as containers for ink, and are very reusable.
And for people looking for a free printer and a project, well, I can’t complain!

hi ive put i back together but it says unit fault and unable to print can you help please.
Hi Sean,
If you have the same/similar model to mine, these printers are pretty simple. If you are receiving a “unit fault” error, that would indicate to me that something was not wired correctly. Make sure all ribbon cables, wires and connectors are inserted properly and securely. Make sure none of them are pinched or under extreme stress. Be sure to check the print head, and make sure the belt and head can move freely.
If everything is wired correctly, perform a good inspection of all circuit boards for physical damage. Maybe a component got knocked off during the reinstall, or maybe a piece of metal or a screw got wedged under a board and is making contact.
It may be necessary for you to disassemble it completely again, and put it back together again to make sure you don’t miss anything. I’m sure you can get it working again!
Dan
Hi. How long you need to dry printhead after washing ?
I used really hot water to help it evaporate. After wiping it and shaking off any loose water, I let it dry for about an hour. Your mileage may vary, maybe use a hair dryer to help (not too hot!)
Thanks, very good and detail description with photo, can take out the print head of dcp 210c and clean it completely. Thanks again. 🙂
Thank-you for sharing such a great information about Brother DCP-120C Inkjet Printer and what are the issues and problem faced while operating the printer. Nicely explained the cleaning methods of printer.
Dcp 120c läßt sich nicht einschalten.
Einschalten und Steckerkombinationensind ausprobiert.
Kondensator,
Netzteil, Einschalttaster?
Wie kommt man an das Netzteil.
Grüße aus Gera
R.Müller